Friday, June 24, 2011

$22 DIY Camera Slider - Code Name: KronoX

Update 7-4-11: I removed the mystery pex from the inside of the sliding platform. It works great without it! Also, something i tried is I applied "Armor All" original to the broom sticks and buffed it in really well. It now slides like it was on bearings. A simple 10 degree tilt at one end and it easily slides to the other. If I didn't know any better I would say its even quieter as well, very silent. 


Update 7-3-11:  Something I forgot to add is that my broom sticks have small grooves on the outside.  I intentionally chose this because my theory is that the grooves will create less surface tension on the sliders and would create lens friction and therefor less noise.  One other thing, in the top 90 degree elbows where the broom enters I had cut small pieces of the mystery pex (working on what exactly it is and will update) to simply give the broom less room to move.

Today I have the pleasure of introducing to you my latest DIY project, a camera slider.  I call it KronoX with emphasis on the X for obvious reasons.  This design will give you the combination of looking professional, lightweight frame, easy to build, and inexpensive all in the same package!


This puppy totals to approximately $22 and I purchased my PVC from Home Depot.

Parts You will Need:
1 - 10ft 3/4inch PVC
2 - 3/4inch Cross Pieces
4 - 90 degree elbows                                
4 - slip caps
4 - 45 degree elbows
8 - Tee's

Cut sizes of PVC:
12 - 1 5/8 inch pieces
2 - 41 1/4 inch pieces
2 - 2 1/2 inch pieces
2 - 2 3/8 inch pieces

Other Parts:
2 - $1.75 broom's from family dollar (or somewhere with cheap brooms, lengths may vary and you will have to adjust the length of your  two 3/4 inch long pieces of PVC.)
1 - eight pack of 1 inch sliding feet with sticky pads from Dollar Tree.
14 - 1 inch screws
1 - Cheap walmart cutting board.

Cut sizes of other parts:
1 - 6 inch x 6 inch poly cutting board piece
1 - 8 1/2 inch x 5 inch poly cutting board piece
2 - Cut broom sticks to final length of 42 1/4 inch

Optional:
-Poly fill
-1" thin wall pex, where ever you may find it.  I would get the brooms first then bring the sticks in with you to make sure whatever you get the handle fits through the tube.  The I.D. of the tube is 1" so this is why I call it so.

Tools required:
-Chop Saw Recommend (hand saw may work fine)
-Marker
-Tape Measure
-Screw driver
-Drill
-Small and Large drill bits
-Sand paper optional, but you might want some to take off edges.
Thursday, June 23, 2011

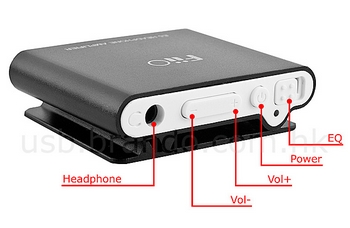
FiiO E5 and E3 for Shotgun Microphone

Updated 9-23-2011:  Here is the video I finally made with the comparisons on audio noise with and without these units, check it out! 


Well I just ordered myself the FiiO E3 and E5 off Amazon.  Totaling $30 free shipping.  The E5 was $22.50 and the E3 was just $7.50.  My hope is to test both in an attempt to remove audio noise / hiss while recording audio directly to my T3i from my HTDZ HT-320A shotgun mic.  Which itself is just a cheap mic I picked up off of ebay for $32 free shipping from good ole China.  Depending on what I find out after testing I will post a video outlining my results.  Hope it works!
FiiO E5 - USB chargeable internal battery
FiiO E3 - One AAA battery powered

Tuesday, June 21, 2011

"Remorse"


Hey guys, just wanted to post my latest video "Remorse."  When we shot this it was done in a small cemetary.  For my moving shots I actually set my camera on a bike seat and had my brother push the bike while I shot.  It came out really wobbly due to only two tires and moving side to side.  I might think about getting my hands on a couple trash bikes and joining them together for a smooth four tire rolling glide track sensation!  Below I have posted some before and after images.  Tell me what you think of them in the comments.  Cheers!


Welcome one and All to the New kinda sorta Beta homepage!

Hey guys, Chad here.  This is going to be a beta homepage for now.  In an effort to update my website and load photos with ease, I have found a script that lets me insert a page in a page.  So far I have noticed that if you click a picture that was uploaded it will enlarge it within the page.  To get back to the regular home page without clicking the home tab just hit the Backspace key and your good to go.  Let me know how you guys like the idea!  Cheers.